
Seed Cleaning Techniques for Seed Saving

In order to successfully store the seeds you harvest, they must be cleaned thoroughly first. There are two categories of seed cleaning techniques based on whether the mature seeds are borne in wet structures or basically dry on the plant. Wet processing is a 3-step process used to clean seeds that are enclosed in the wet flesh of a fruit or berry. Tomatoes, cucumbers and muskmelons, are examples of crops that require wet processing. Dry processing is used for seeds harvested from pods, husks, and various other structures on plants like corn, radishes, okra, or beans.
Wet Processing
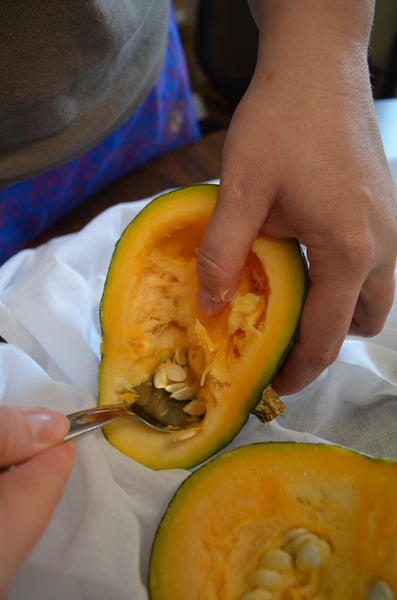
Step 1. Remove seeds from fruit or berry– You can slice open and scrape to remove seeds (tomatoes). Small fruits or berries (with seed) can be mashed or pulsed in a blender with equal parts water to separate seeds from the pulp. With this method, the viable (good) seed sinks to the bottom, while pulp and non-viable seeds float.
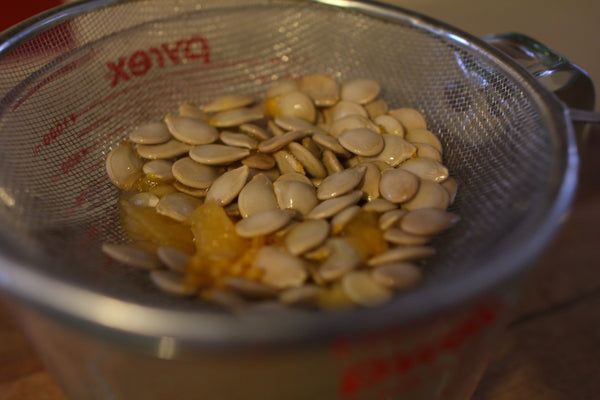
Step 2. Clean seeds- Once extracted, seeds need to be rinsed repeatedly until no pulp residue is left. In some species, the seeds have a gelatinous coating that is difficult to remove and can inhibit germination. In this case, seeds must go through a fermentation process. During fermentation, microorganisms break down the pulp and can destroy many seed-borne diseases, if present. Tomatoes and several members of the squash family, particularly cucumbers, do best if fermented.
Fermentation-Place seeds and pulp in a clean container. Some suggest adding a small amount of water at this point, while others say not to. Leave the container uncovered or loosely covered and within a couple of days, a layer of white or gray mold will begin to form on top of the mixture. The mixture will also begin to smell. This is good! Once the layer of mold has completely covered the surface, you can stop the fermentation process. This generally takes three to five days. At warmer temperatures, the fermentation process goes quicker. At this point, you should add enough water to double the amount of mixture. Swirl seeds around in water and allow the viable seeds to sink and the moldy pulp to settle on top. Scrape off the moldy pulp and pour the remaining mixture through a colander small enough that seeds will not go through. Repeat this decanting process until all you have left are clean seeds.
Step 3. Dry seeds- Place clean seeds onto a non-stick surface for drying. Screens, cookie sheets, and ceramic dishes work well for drying. Avoid paper surfaces which will stick to the seeds. Spread seeds thinly and stir periodically to ensure speedy and consistent drying. Fans also help speed drying. Never dry seeds in the full sun or anywhere temperatures exceed 95 F!
Dry Processing
For seeds which are harvested dry, the seeds must be separated from the capsule, pod, or other plant parts to which they are attached. If possible, allow seeds to completely dry on the plant. If seeds must be harvested before they are fully dry, store in a dry location where temperatures are above freezing, but below 95 F until dry. Threshing is one technique used to separate dry seeds from other plant parts. The dried seed heads or pods are first beaten, rubbed, or flailed until the seeds are free. Seeds are often threshed in a sack or pillow case by beating against a hard surface. Once free, the seeds still need to be separated from the plant debris (a.k.a. chaff) present after threshing. This is where a process called winnowing comes in. There are many ways to “winnow” seeds, and the one you choose depends on the plant you are working with. A common technique for plants in which the seeds are heavier than the chaff involves a fan, tarp, and gravity. Here, a fan is elevated on a surface such as a chair and the ground is covered with a tarp. The seed and chaff mixture is held in front of the running fan and poured onto the tarp. The heavier seeds fall to the ground, while the lighter chaff is blown away. For seeds whose weight equals the chaff, try rubbing the seed against a screen that allows seed to fall through, but not the chaff. You may need screens of different sizes to remove various sizes of chaff.
| |
Article Written by: Angie Lavezzo |
|
About the Author: Angie Lavezzo is the former general manager of Sow True Seed. Beyond her professional role at Sow True, Angie's passion for gardening extends into personal hands-on experience, fostering plants and reaping bountiful harvests. |