Sow True Seed: Our Generative AI Policy
Sow True Seed will never use generative AI in any art, copywriting, blog posts, or advertisements of any kind. Our human-first business will continue to be just that - human...
Fresh new look, same great seeds - read all about our brand refresh on our blog!
Free Shipping on all orders over $50!


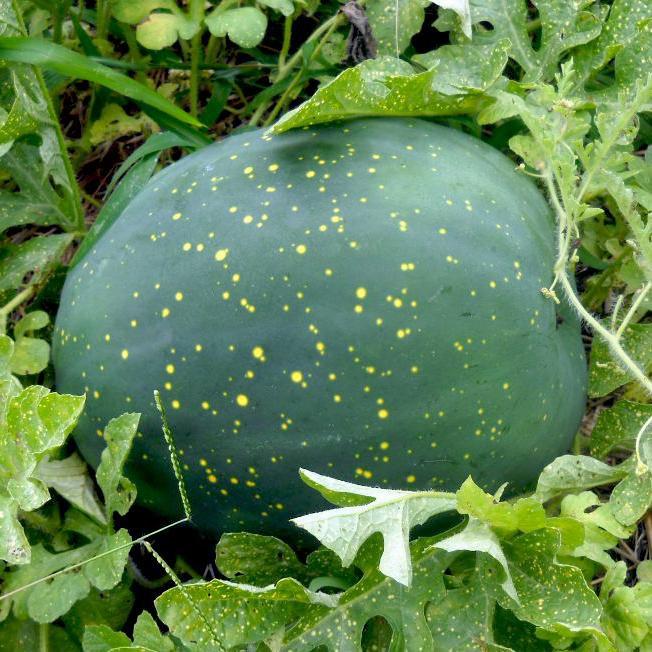
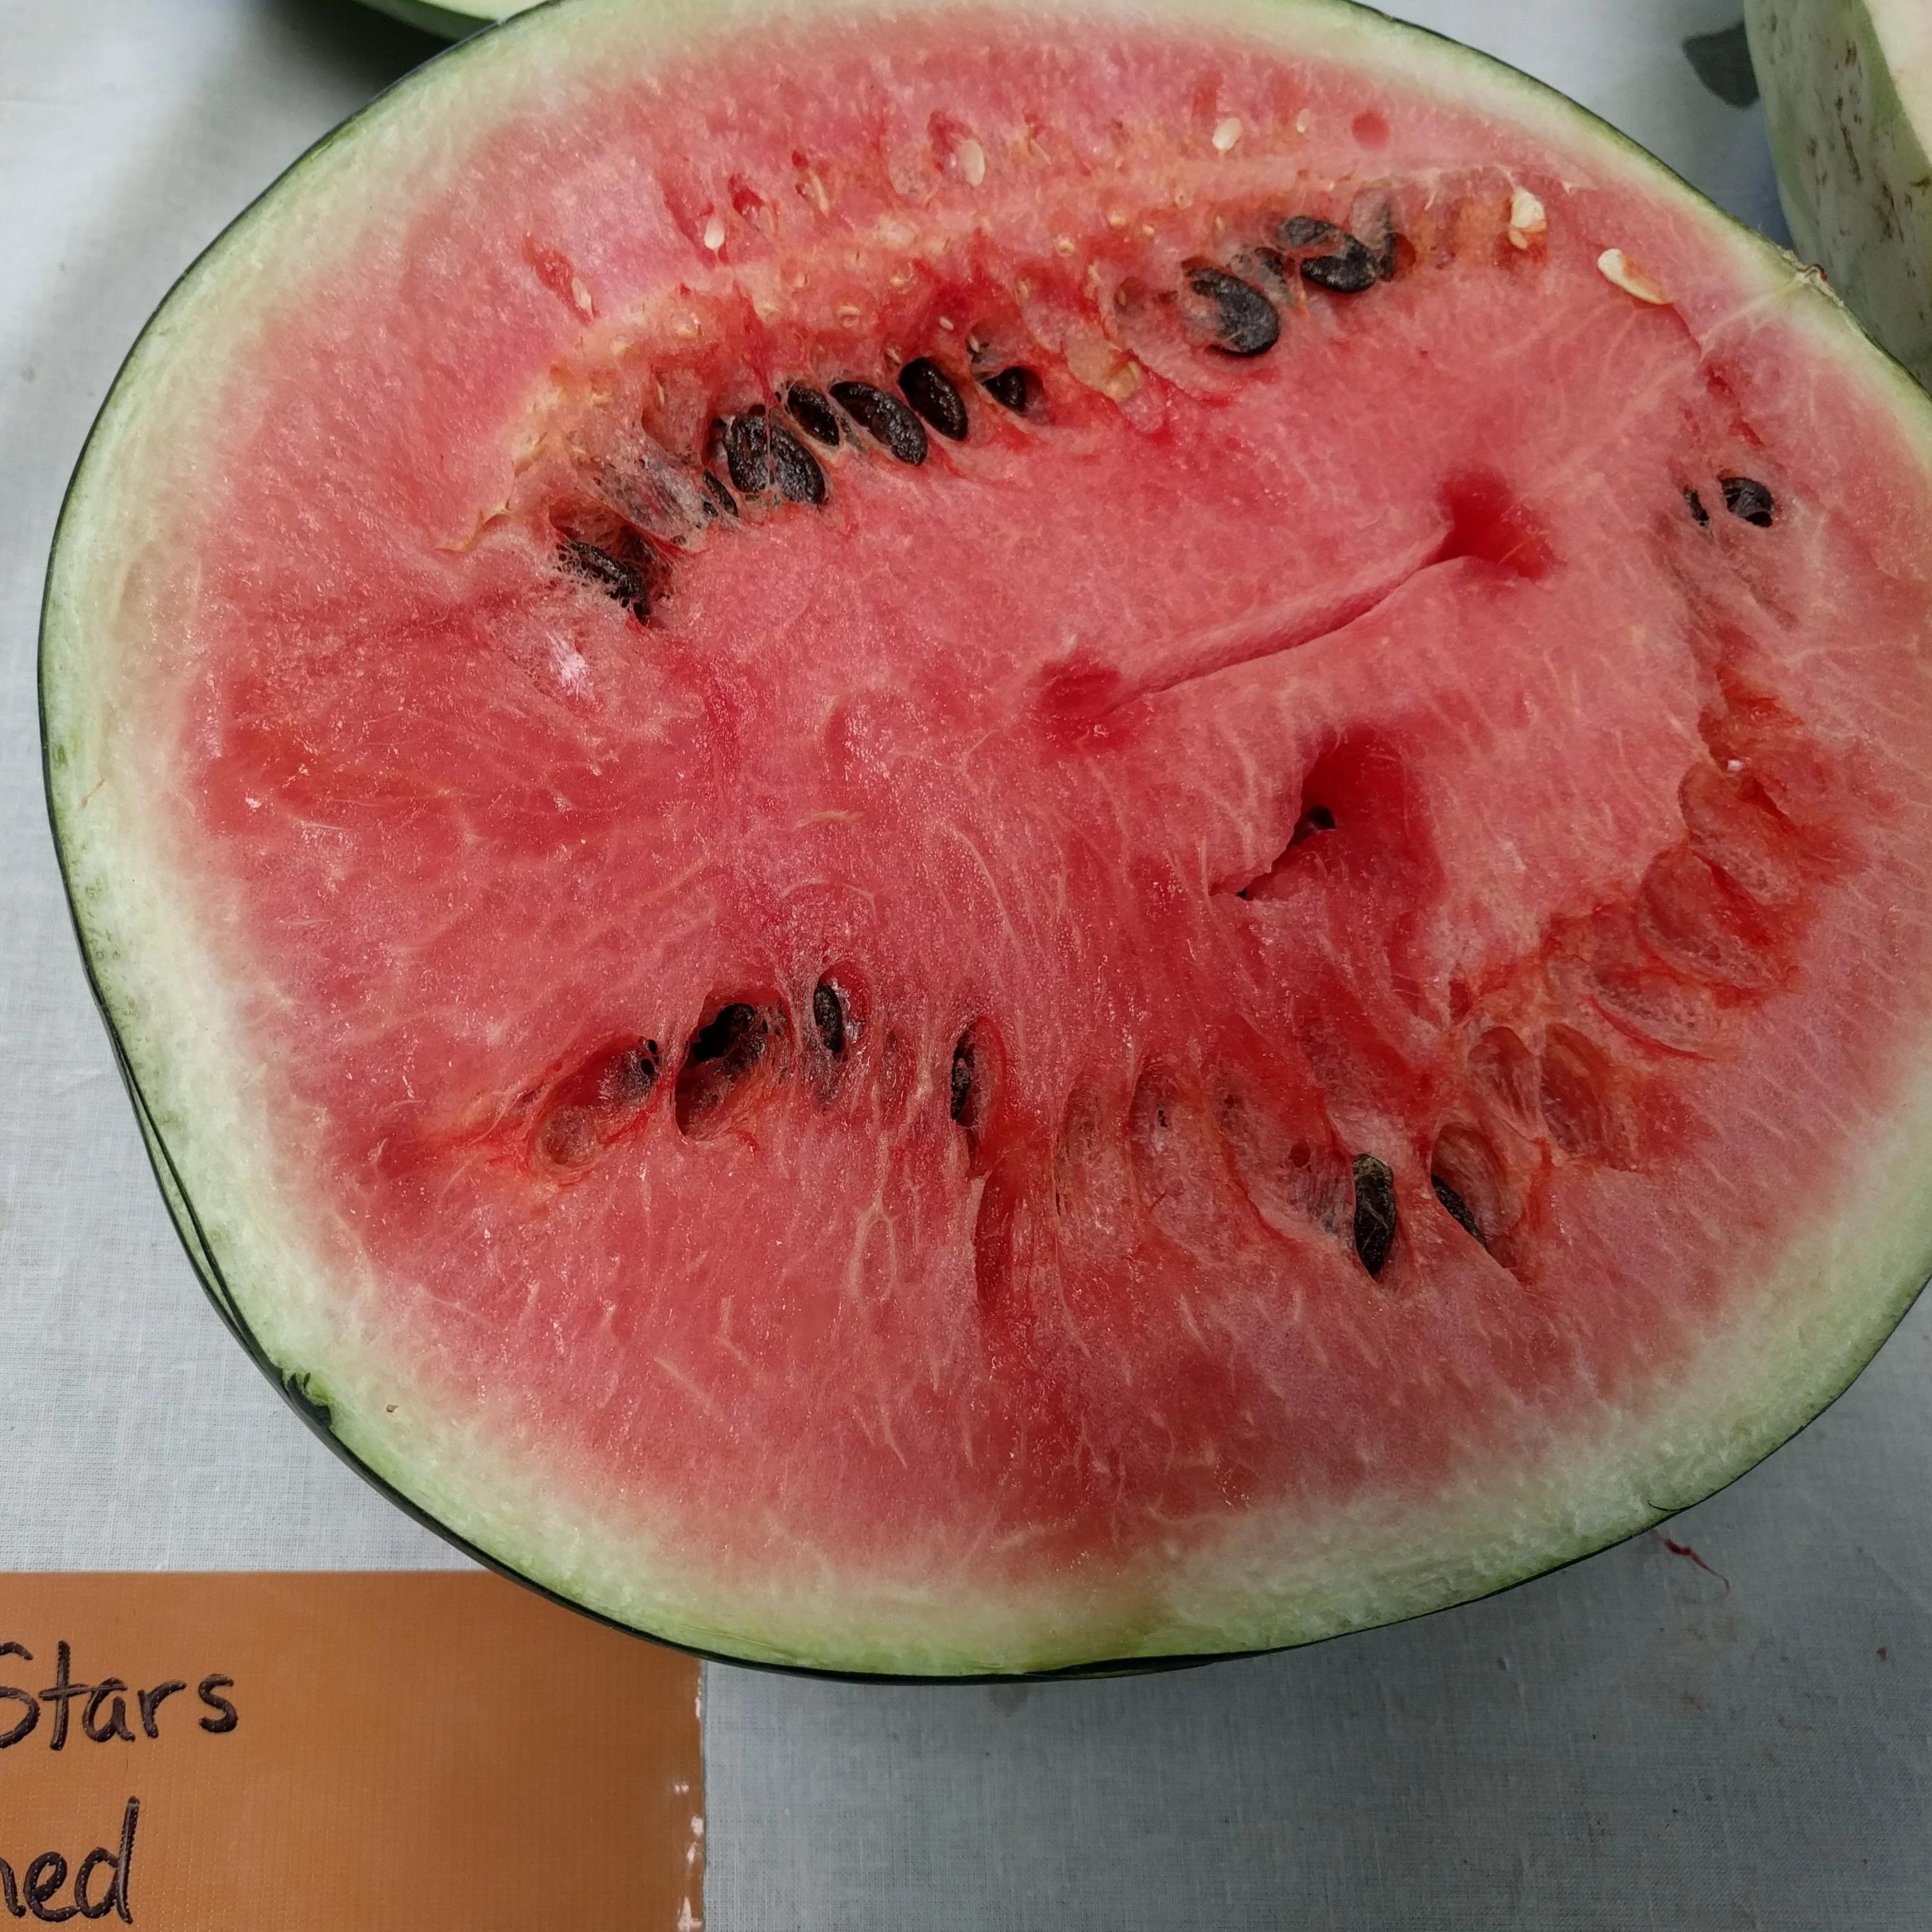
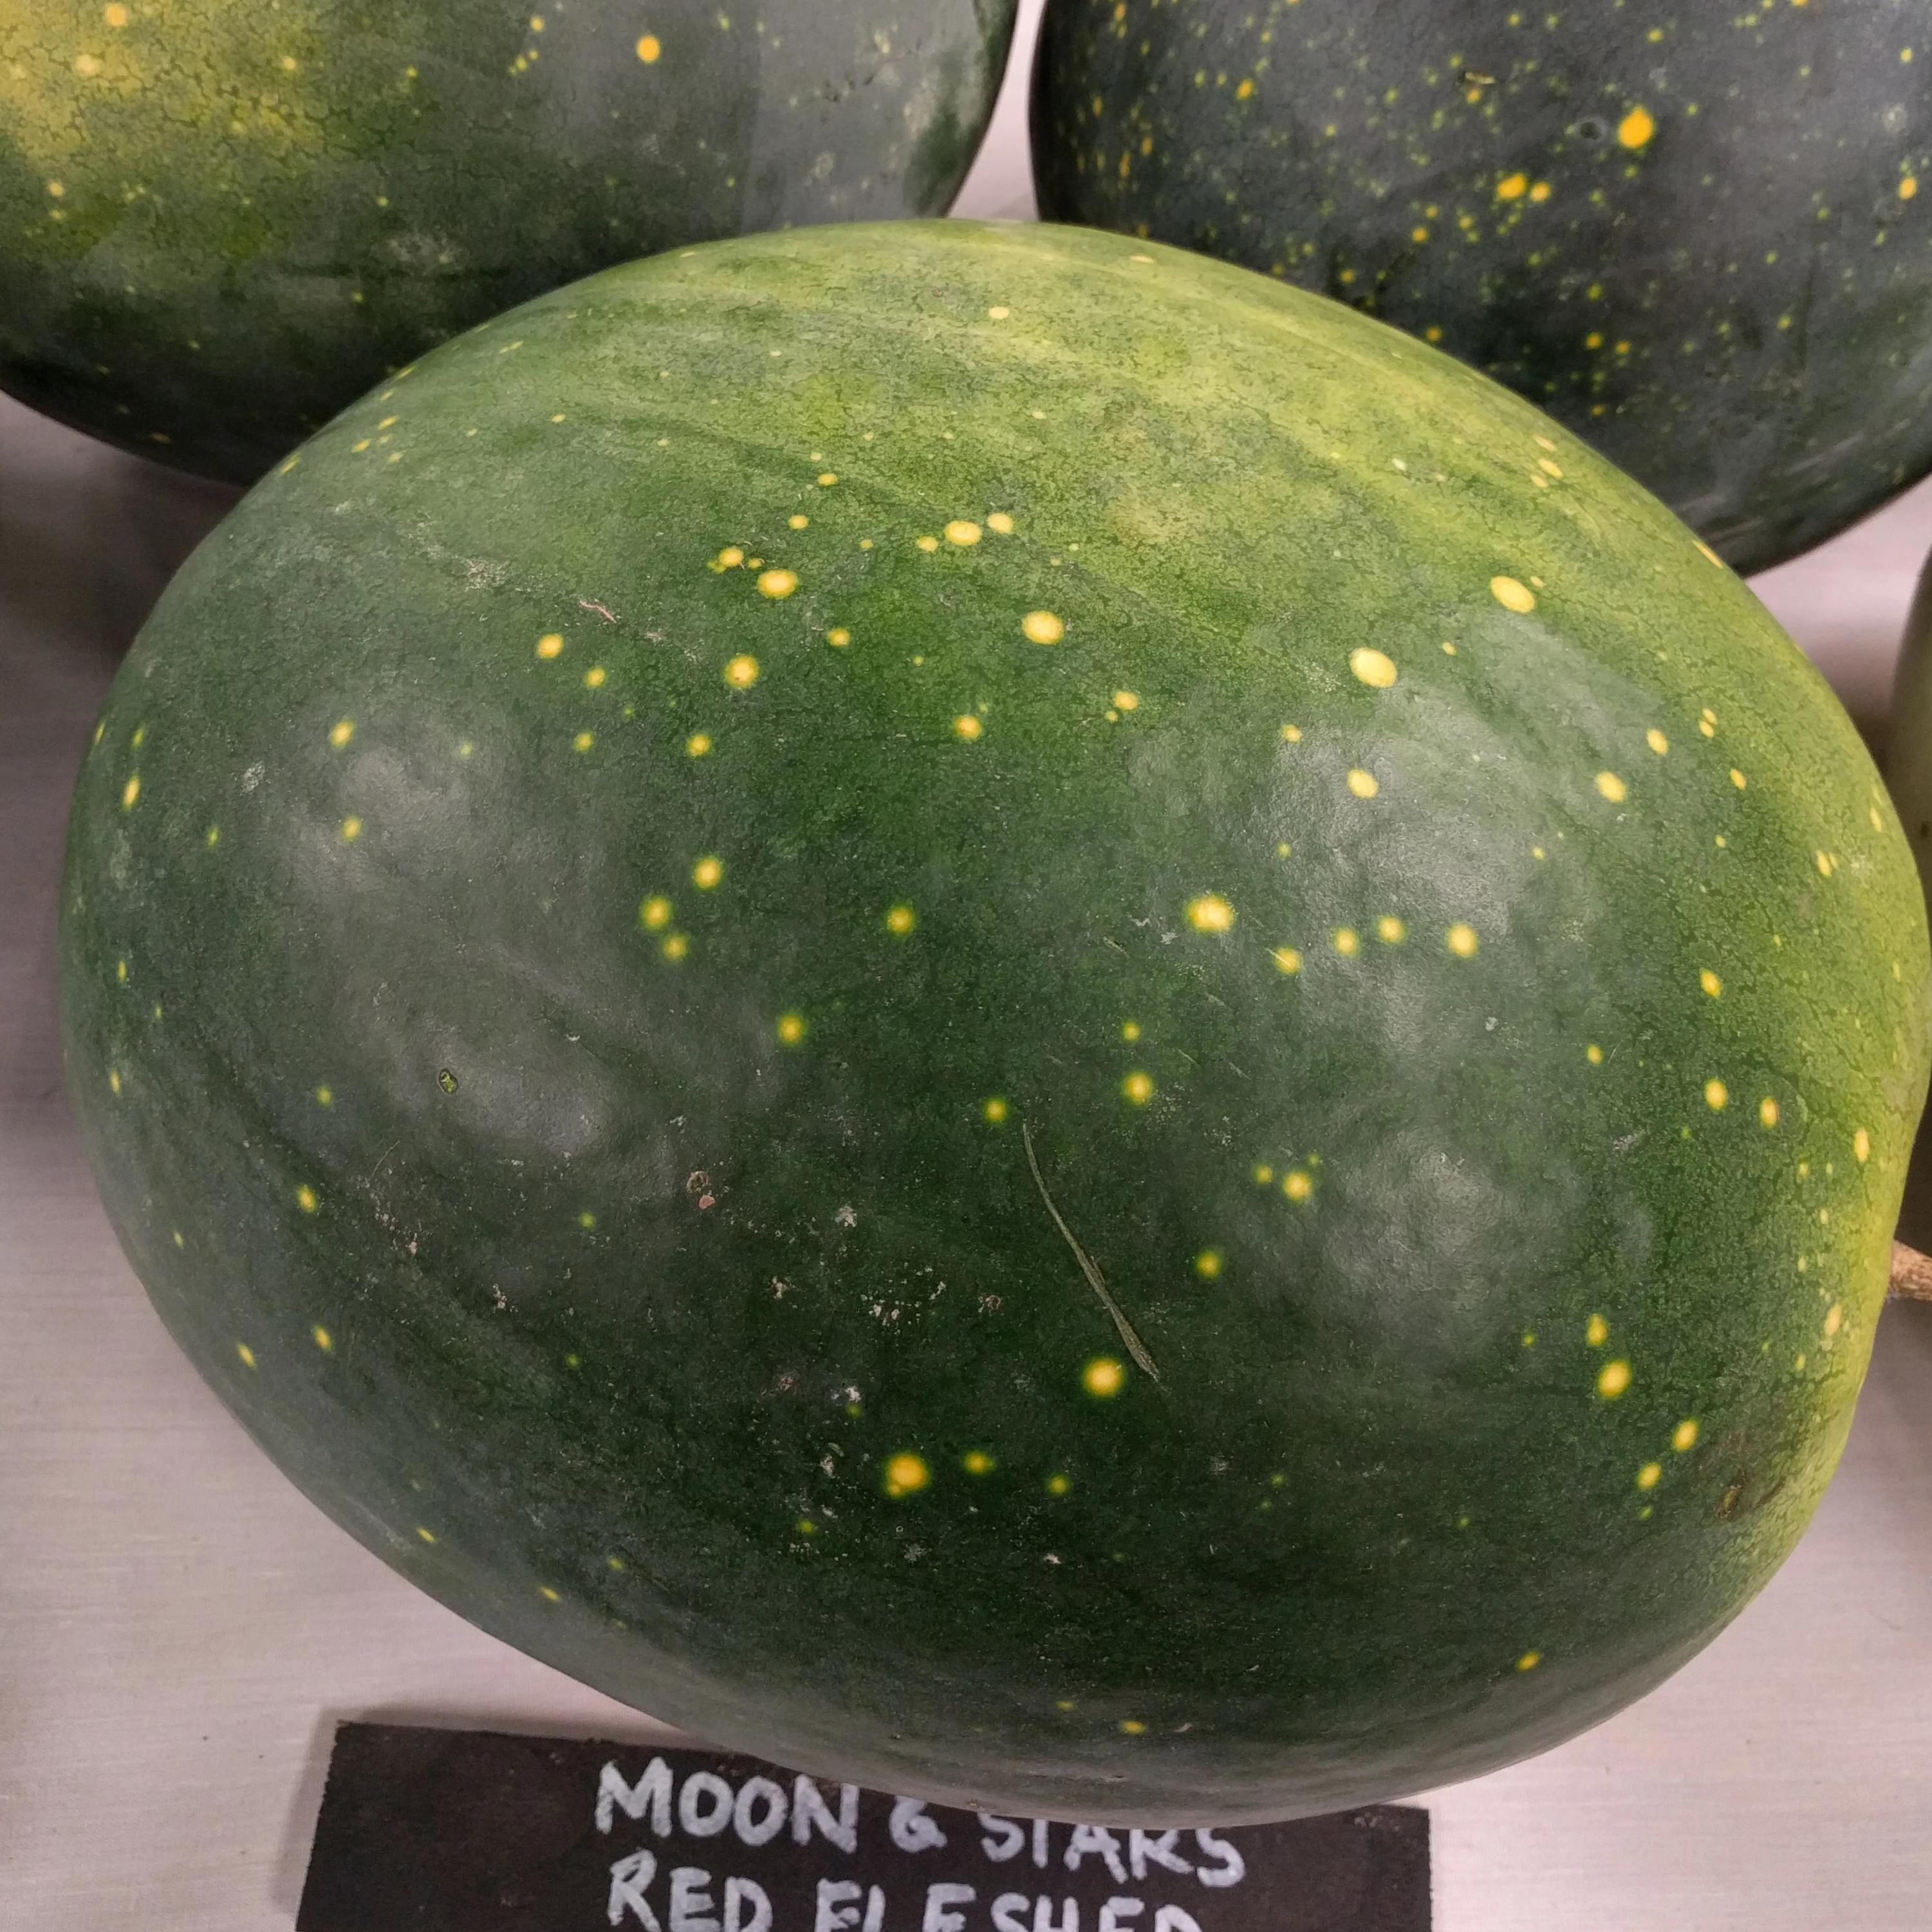
HEIRLOOM. The Moon and Stars Watermelon has luscious red flesh with a dreamscape rind of small yellow "stars" and large yellow "moons" on a dark green skin. Introduced in 1926 from Missouri, this gem features large fruits grow up to 40 lbs with exceptional flavor that has earned it a spot on the Slow Foods Ark of Taste.
Minimum Seeds per Packet: 18
Packet Weight: 2g
Planting Season: After Last Frost
Sowing Method: Direct Seed or Transplant
Seed Depth: 1/2"
Direct Seed Spacing: 6"
Soil Temperature: 70-90 ℉
Days to Sprout: 5-10
Mature Spacing: 18-24"
Sun Requirement: Full Sun
Frost Tolerance: Frost Sensitive
Days to Harvest: 85
Growing watermelon from seed to plate is an immensely rewarding experience! There’s nothing quite as refreshing as a cold slice of watermelon on a hot summer day, and who doesn’t love a good seed-spitting contest? Aim for a bucket and save your own watermelon seeds to grow them again and again.
You can typically expect to get two to four fruits per watermelon plant, but it depends on the variety and the conditions they are grown in. Consider how many fruits you want to end up with and how much space you have when deciding how many plants you want to grow. As elaborated on below, watermelon plants do best with ample space! Overcrowding will yield fewer fruits and will decrease their chances of becoming ripe.
You can either direct seed or transplant watermelon. If you want to give your watermelons a head start, which is preferable if you live in an area with a short growing season, start watermelon seeds indoors four to six weeks before your average last frost date. Watermelons, as with most heat-loving, cold-sensitive summer crops, are best planted out at least two weeks after your area’s average last frost date. This goes for both direct seeding and transplanting. Ideally, the temperature of the soil three inches below the surface should consistently be over 70℉ for watermelon seeds to germinate and the air temperature should no longer be dropping below 50℉. Where we are in Western NC, we’re typically planting watermelon seeds or starts outside from the second half of May through the end of June.
Plant watermelon in the very sunniest place possible! They want 8+ hours of direct sunlight in order to produce mature fruit over the course of a season. Watermelons prefer to be grown in-ground as opposed to in a container. The earth regulates soil temperature and moisture better than a container, and watermelon roots like to spread laterally which a container would not allow. Watermelons grow best in well-draining loamy soil, so if the soil you are working with is mostly composed of clay, amend with plenty of organic matter such as compost to improve the soil structure. In terms of soil pH, they do best in slightly acidic to neutral soil (6.0 - 7.0 pH). Watermelon plants produce long vines that grow along the ground and do need a fair bit of space accordingly! If you overcrowd them, the decrease in airflow through the foliage will likely result in diseases like powdery mildew. If you are short on space, you can try trellising, but watermelon plants are not natural climbers so you’ll need to tie the vines to the trellis and support the heavy fruit with slings as they grow. Choose a very sturdy trellis if you go this route as they’ll be holding a lot of weight! All melons are traditionally planted in mounds to aid in drainage to prevent rot. If you are growing in rows, sow seeds at least 18” apart with the rows at least 6’ apart to give their vines room to spread. If you are just growing a few plants in your backyard without rows, space your mounds at least 4’ apart in all directions. The more space you can give them, the better!
Sow watermelon seeds about ½ an inch deep. Water thoroughly! Not watering enough is the number one reason folks struggle with germination. Sprouts should emerge in 3 to 10 days.
You can sow 4 or 5 seeds per mound and thin back all but the strongest two once the seedlings have grown two sets of true leaves. That way, you’ll have something in that spot even if one seed doesn’t germinate, one seedling gets eaten, etc., and even if they all survive just fine, this process of planting extra and only keeping the best ones is a form of selection. Continue to water frequently in the first few weeks to help get the plants established. Mulching is also a good idea to conserve moisture and decrease weed pressure.
As always, it is really important to water regularly and maintain soil dampness from the time you plant a seed until it is a more established plant at which point it is better equipped to handle environmental stress. Not watering enough is the number one reason people struggle with germination and survival of seedlings!
Watermelons can be traced back to a drought-tolerant, bitter ancestral plant in southern Africa. Similar wild watermelons still exist there today and continue to be a source of water for Indigenous peoples living in dry lands. Today’s domesticated watermelons are much sweeter but are not as good at surviving harsh droughts. More frequent, lighter waterings are preferable to letting your watermelon plants go through drought/saturation cycles as that sudden influx of water can cause the fruit to split. The majority of watermelon roots are found in the top 12” of soil, likely a feature that helped them maximize absorption during the light rains of the lands they evolved in. So aim to maintain relatively even soil moisture, and avoid keeping the soil saturated or you’ll face rot issues. This is why well-draining soil is so important and also why melons are planted in mounds to aid in drainage.
When your watermelons are nearing ripeness, water less! Too much water close to the time of harvest can dilute the sweetness and flavor of the watermelon and can cause them to split.
A note on nutrients - Watermelons are heavy feeders! Consider feeding them every three to four weeks with a balanced fertilizer, compost, compost tea, or worm castings.
An age old question! It can be difficult to tell. Color and sound can help us figure out if a watermelon is ripe. Where a watermelon touches the ground, the rind is usually a different color. Deep yellow or cream suggests ripeness while white or light green suggests immaturity. The surface color of the fruit turns dull as it ripens. The rind strengthens and becomes more difficult to indent with a fingernail. Any tendrils found where the melon meets the stem will dry and turn brown. The tricky thing is that these visual cues may not all happen at once. When tapped, ripe watermelons sound duller/more hollow than immature ones. Unripe watermelons will sound higher in pitch. To get a rough estimate on when to harvest, add the “days to harvest” number found on your seed packet to the date you planted the seed. Harvest by simply cutting the melon off the vine with a sharp implement like a knife or pruners. Watermelon seeds are ripe at the same time that the fruit is ripe! Check out the Seed Saving tab for more info.
Watermelons are in many ways the perfect crop for beginner seed savers. They're easy to work with, however, the necessary isolation, at 800 feet to a ½ mile is not always feasible for home gardeners. Watermelons are monoecious, meaning they have separate male and female flowers. They are largely insect pollinated but may benefit from hand pollinating.
Watermelons contain viable seeds as soon as they are ripe. This is unlike other species where the fruits have to be left to mature past peak eating time, taking up precious garden space. Perhaps the most difficult part of growing watermelons for seed or otherwise, is knowing when they're ripe. It's a bit of an art but we recommend using a combined effort of…
Watermelon seeds occur throughout the flesh of the fruit. As the fruits are eaten, seeds can be spit out and saved. Did someone say watermelon eating party? Saved seeds should be rinsed in a strainer or colander until all leftover flesh is washed away. They can be spread in a thin layer to dry on paper towels, recycled window screens, or any other materials that will allow for airflow. Watermelon seeds should be left to dry for up to a week and stored in an airtight container in a cool, dark place for up to five years.
Sow True Seed will never use generative AI in any art, copywriting, blog posts, or advertisements of any kind. Our human-first business will continue to be just that - human...
Brussels Sprouts can be grown in all areas of the United States. Their long time to maturity and sensitivity to nutrient imbalances have given them a reputation for being difficult....
Sometimes with beets it seems that people love them or… don’t love them. But we are of the belief that if you think you don’t love beets - you just...


