Sow True Seed: Our Generative AI Policy
Sow True Seed will never use generative AI in any art, copywriting, blog posts, or advertisements of any kind. Our human-first business will continue to be just that - human...
Fresh new look, same great seeds - read all about our brand refresh on our blog!
Free Shipping on All Orders - All December Long!


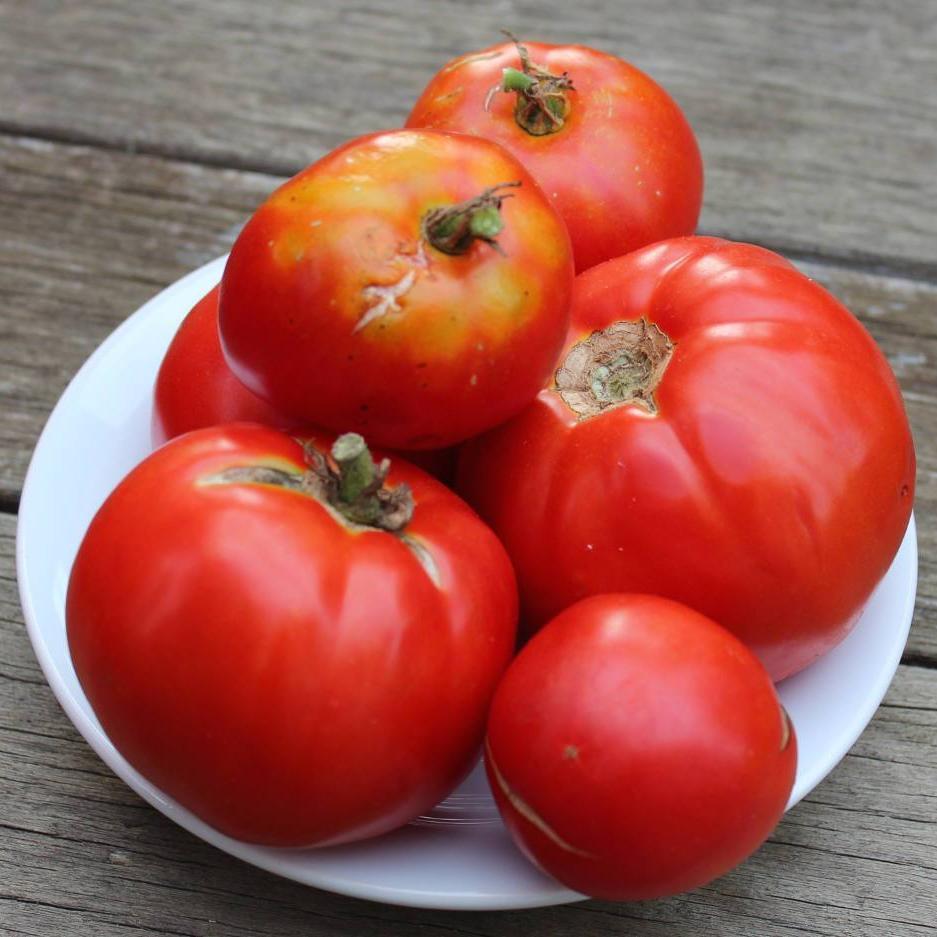
ORGANIC. HEIRLOOM. This early producing tomato has been grown for generations in the Monongahela National Forest Region of West Virginia. Four to six ounce fruits are round, smooth, and sweet.
Determinate.
0.15 gram packet contains a minimum of 40 seeds.
Minimum Seeds per Packet: 40
Packet Weight: 0.15 g
Planting Season: After Last Frost
Sowing Method: Transplant
Seed Depth: 1/4"
Direct Seed Spacing: N/A
Soil Temperature: 60-80 ℉
Days to Sprout: 6-14
Mature Spacing: 18-24"
Sun Requirement: Full Sun
Frost Tolerance: Frost Sensitive
Days to Harvest: 68 from Transplant
Start tomato plants from seed indoors eight to ten weeks before your last frost. Starting tomato seeds indoors is necessary in most growing zones as our seasons are not typically long enough to allow this tropical plant to produce from seed directly in the ground. Starting seeds indoors and transplanting after your last frost will allow your tomatoes to mature to harvest safely. Cool temperatures in spring can stunt growth or even kill young seedlings.
Sow seeds two to three seeds ¼” deep in seed starting containers. Cover with soil and pat down lightly to ensure adequate seed to soil contact. Keep seedlings well-watered until germination and throughout their growth. We recommend watering twice a day but ensuring the soil is not sopping wet. Tomato seedlings need to be kept warm in order to germinate. To ensure soil temperatures between 70 and 80°F, keep your seedling trays or containers on a heat mat.
Seedlings being grown indoors will need to be kept under high quality grow lights in order to mature. In most areas, the spring sunlight is rarely enough light to grow healthy seedlings, even in the sunniest of south-facing windows. Keep lights four to six inches above seedlings to avoid burning the plants and continue to raise the light as the plants grow.
Keeping seedlings under a humidity dome can help keep soils moist enough to germinate your seeds. When they begin to germinate, remove the humidity dome. Check that your seedlings stay moist for the first couple weeks after sprouting. They have not developed many roots yet and will dry out quickly without your help. Water from the top down in the beginning, and then you can switch to soaking the seed flats in water, so the roots are watered from the bottom up, which helps develop strong roots. Be sure to check your seedlings everyday for adequate water, temperatures, airflow, and to avoid any potential pest or disease infestations.
When your plants are about six inches tall and all danger of frost has passed in your area, you are ready to start hardening off your plants. Hardening off is the process of acclimating your plants to outdoor weather conditions and temperatures. Inside your home or greenhouse, your seedlings have been coddled. Outside in the garden, things are a little different. Hardening them off will allow them to adjust rather than experience shock once planted outdoors. About a week before you plan to transfer your plants to the garden, you’ll begin leaving your plants outside in partially shaded areas starting for an hour or two. You’ll slowly introduce them to full sun and longer hours outdoors over the course of a week or two.
Prepare your garden space. You’ll want to use well-draining soil with a good amount of organic matter mixed in. Leaf mulch or well decomposed compost will help to boost nutrient presence and soil quality. Dig a hole about twice as deep as the height of your plants. Tomatoes benefit from being planted deeply as roots can sprout from the stems creating a strong base with which to hold up many beautiful tomatoes! Place a scoop of organic matter such as compost or worm castings into the bottom of the hole. This will give your plant an extra nutritional boost, as tomatoes are heavy feeders. Carefully remove the plants from their containers, taking care not to disturb the roots. Plant your tomatoes deep enough so that they can develop strong root systems but not so deep that the true leaves are covered with soil. Refill the planting hole with soil and pat the planted area lightly. Be sure to remove all of the leaves that are touching soil at the bottom of the plant, as this can contribute to the spread of disease.
Mulching around your plants will help conserve moisture, keep soil from splashing up and spreading disease, and prevent weeds from growing. We love using straw for mulching tomatoes as it can help with water retention too! It is essential to plant your tomatoes at their mature planting distance of 18 to 24 inches. This helps prevent the spread of disease and pest between plants, and make harvesting easier. Place stakes or trellises next to the plants at the time of planting. This will give the plants a support to latch onto as they grow. Doing this early will keep you from accidentally damaging the roots later on, and once you plant outside, tomatoes can grow quite quickly. Trying to trellis a tomato plant after it’s already gotten big is quite a challenge! While there are many different ways to trellis, we recommend using tomato cages or the Florida Weave method.
Fertilizing your tomato plants regularly throughout the growing season can help your plants produce large, beautiful fruits, keep them healthy from disease, and benefit your soil all at the same time. We recommend using a balanced 10-10-10 organic fertilizer every two weeks throughout the season, starting about two weeks after transplanting. A balanced fertilizer will ensure that your tomatoes have what they need to grow beautiful foliage that can hold up the weight of your huge tomatoes.
Water at the base of tomato plants and avoid as much soil splash back on the tomato plant as possible. This helps to prevent the spread of soil borne bacterial or fungal diseases including early and late blight. Tomato blight is a common disease of nightshade crops that is spread through the soil or in the air. While sometimes, with late blight especially, it’s unavoidable, watering at the base of your tomato plants will help stave off the spread of disease for as long as possible. Watering at the base of tomato plants also decreases the likelihood of the tomato plants developing mildew on the leaves.
If you want to promote better growth and a higher fruit yield, pluck the suckers off of your tomato plant using your fingers when they appear. Suckers grow in the crotch between a side stem and the main stalk. Leave a few near the top of the plant to leaf out and help to avoid sun scald of your fruits. Regular applications of balanced fertilizer will also help to increase yields.
Fruit should begin to appear on your tomato plants about 80 days after transplanting. Check the plants daily once they begin to ripen to ensure peak flavor and that none of the harvest is lost to pests that love their taste as much as you do! Gently twist the fruits and avoid pulling at the vine. Indeterminate tomato varieties will fruit and ripen continuously until the first frost in the fall, then they will die back. Determinate tomato varieties fruit for up to one month, producing more fruits all at once, making them excellent for canning or sauce making.
Tomatoes are a part of the Solanum lycopersicum family, a frost sensitive perennial that is grown as an annual in temperate climates. Tomatoes are autogamous meaning they are able to self pollinate. Self-fertile tomato flowers are either individual or in clusters of two to 20 flowers. Tomato flowers have inserted stigma, that are entirely contained within the anther cones, allowing pollen to be shed inward towards the stigma and self pollination occurs. If proper isolation distances are not followed, tomatoes can be cross pollinated with other tomatoes by insects. This is only a concern if you are looking to save seed from your tomatoes and want the seed to stay true to type.
Tomatoes require temperatures to be between 50 and 90°F for flower development.- If temperatures fall below 50°F the development of pollen tubes may halt.. If temperatures are too high, above 90 °F, surfaces on the stigmas may not be receptive to pollen, making fruiting difficult or impossible.
We recommend an isolation distance between ten and 50 feet for different tomato varieties if saving seed. If isolation distance is not achievable, then bagging flower blossoms is the best method to use for gardeners who want to grow more than one tomato variety. Bags can be placed around entire clusters of tomatoes rather than individual flowers. Once small developing fruits appear bags can be removed to allow normal fruit development.
For seed saving, as little as one tomato plant is needed. However, to ensure genetic diversity, it is best to save seeds from multiple plants. Five to ten tomato plants is a recommended population size for capturing the proper genetic diversity of a variety.
Harvesting tomato fruits for seed saving is the same as harvesting for fresh eating.Fruits should be completely ripe and not rotten. Seeds should be extracted from the fruits soon after harvesting. Extracting seeds from tomato fruits can be as easy as cutting the fruit in half and removing the seeds with pulp into a container or jar.
Fermenting tomato seeds is the next step on your journey of seed saving! This step breaks down the gelatinous placental sacs that contain germination inhibitors that encase tomato seeds. Take your container with your seeds and pulp and fill it with equal parts water. Place the container in a warm location away from direct sunlight, ideally between 70 and 85 °F. Cover with a breathable cloth or mesh to prevent pests from making their way in. Depending on the temperature, the fermentation process can take between 24 and 72 hours. Do not allow the fermentation process to exceed three days as this runs the risk of seeds germinating once the placental sacs are broken down. As fermentation occurs, stir the mixture several times a day to ensure even fermentation. After a couple of days, a layer of fungus will begin to appear on the top of the mixture. This fungus not only eats the gelatinous coat that surrounds each seed and prevents germination, but it also produces antibiotics that help to control seed-borne diseases like bacterial spot, canker, and speck. Once the majority of mature seeds have sunk to the bottom of the container, fermentation is complete.
The cleaning process begins with adding more water to the mixture and stirring. Once the mixture has settled, the pulp and immature seeds that float to the top should be poured off. Repeat this process until most of the pulp has been removed and only viable seeds remain. Transfer the seeds to a strainer and rinse until the seeds are clean. Lastly, lay seeds out on screens or paper towels to dry. Mix the seeds around occasionally to prevent them from sticking together. Once the seeds are fully dry, they are ready for storage. Tomato seeds have a life expectancy between four and six years (sometimes even longer). Store your tomato seeds in an air tight container in a dark, cool, and dry place.
Sow True Seed will never use generative AI in any art, copywriting, blog posts, or advertisements of any kind. Our human-first business will continue to be just that - human...
Brussels Sprouts can be grown in all areas of the United States. Their long time to maturity and sensitivity to nutrient imbalances have given them a reputation for being difficult....
Sometimes with beets it seems that people love them or… don’t love them. But we are of the belief that if you think you don’t love beets - you just...


